.png)
COOKBOOK FOR THE HOLIDAYS WITH INSTRUCTIONS
- Lady Janice

- Dec 30, 2024
- 11 min read
As the holiday season approaches, I find myself reaching for my trusty recipe notebook, filled with cherished family recipes and culinary secrets I've gathered over the years. But let's be honest - orchestrating a perfect holiday feast can feel like conducting a complex symphony, where timing, preparation, and execution must harmonize flawlessly. 🎄✨
After years of hosting both triumphant celebrations and learning from near-disasters, I've created this comprehensive COOKBOOK FOR THE HOLIDAYS WITH INSTRUCTIONS guide to share my tried-and-true strategies. From crafting the perfect menu to mastering the art of timing multiple dishes, I'll walk you through everything you need to know to become a confident holiday host. Whether you're a first-time host or a seasoned chef looking to refine your approach, this guide will help transform your holiday cooking from stressful to seamless. 🎯
Let me take you through the essential elements of holiday meal planning, must-have kitchen tools, crucial preparation timelines, and smart strategies for accommodating various dietary needs. Plus, I'll share my secret tips for food safety, storage, and presentation that will make your holiday feast both memorable and stress-free. 🌟

Essential Holiday Menu Planning with your COOKBOOK FOR THE HOLIDAYS WITH INSTRUCTIONS
I've learned through years of holiday hosting that successful menu planning is the cornerstone of any memorable feast. Let me share my tried-and-true approach to creating the perfect holiday spread.
Quick and Easy Appetizers
I always start my holiday menu with appetizers that can be prepared in advance. Here are my go-to selections:
Appetizer | Prep Time | Make-Ahead | Serving Temperature |
Cranberry Brie Bites | 20 mins | 1 day ahead | Warm |
Spiced Mixed Nuts | 15 mins | 1 week ahead | Room temp |
Smoked Salmon Canapés | 25 mins | 4 hours ahead | Cold |
Stuffed Mushrooms | 30 mins | 1 day ahead | Hot |
I've found that offering a mix of hot and cold appetizers helps manage oven space and timing. My personal rule is to prepare at least one item that can be served at room temperature.
Show-stopping Main Courses
For the centerpiece of my holiday table, I focus on dishes that deliver both visual impact and flavor. My proven main course strategy includes:
Traditional Options:
Herb-crusted Prime Rib
Maple-glazed Ham
Butter-basted Turkey
Modern Alternatives:
Stuffed Butternut Squash (vegetarian)
Cedar-planked Salmon
Crown Roast of Pork
I always calculate portions based on 1½ pounds of turkey per person or ½ pound of boneless meat per guest. This ensures plenty for seconds and leftovers.
Festive Side Dishes
My side dish selection follows a simple formula to ensure variety:
Starchy Sides (choose 2-3):
Garlic Mashed Potatoes
Sweet Potato Casserole
Wild Rice Pilaf
Green Vegetables (choose 2):
Roasted Brussels Sprouts
Green Bean Almondine
Sautéed Winter Greens
Additional Vegetables (choose 1-2):
Honey-glazed Carrots
Roasted Root Vegetables
Creamed Corn
I've learned to prepare at least half of my side dishes in advance, which has been a game-changer for managing kitchen workflow.
Decadent Desserts
My dessert strategy focuses on variety and timing:
Dessert Type | Make-Ahead Window | Storage Method |
Pies | 1-2 days | Room temp/Refrigerated |
Cookies | 1 week | Airtight container |
Puddings | 2 days | Refrigerated |
Cakes | 1 day | Room temp |
I always include:
One traditional pie (like my signature Spiced Pumpkin)
One chocolate option
One fruit-based dessert
One make-ahead option (like a trifle)
For my holiday menu planning, I've developed a practical approach to portions. I plan for:
3-4 appetizer pieces per person
2-3 side dish servings per person
1.5 dessert servings per person
Balance is key in my menu planning. I ensure there's a mix of:
Light and heavy dishes
Hot and cold items
Make-ahead and last-minute preparations
Traditional favorites and new experiences
Now that we have the menu planned, let's look at the essential kitchen tools and equipment needed to bring these dishes to life.
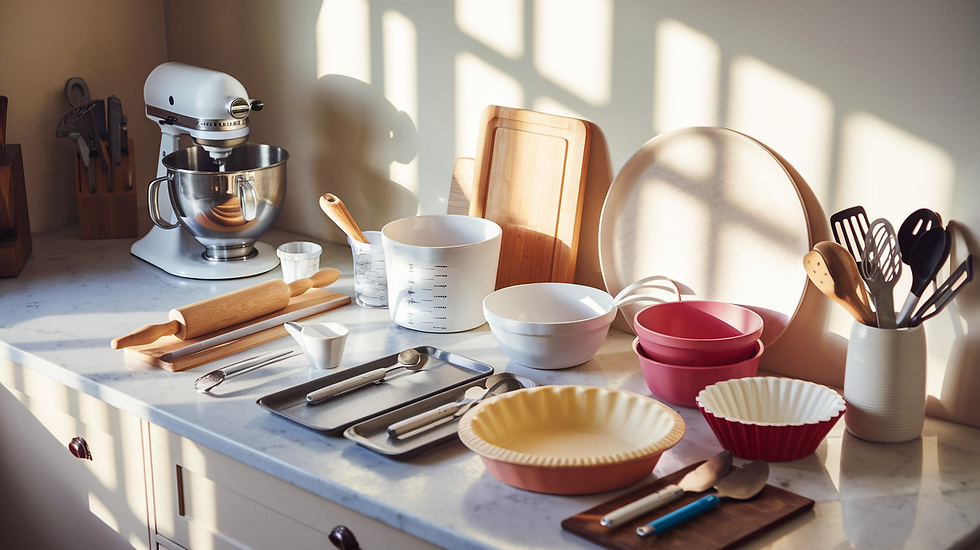
Kitchen Tools and Equipment
Having the right tools in my kitchen has always been crucial for successful holiday cooking. After years of preparing festive meals, I've curated a comprehensive list of essential equipment that makes my holiday cooking both efficient and enjoyable.
Must-have Cooking Utensils
I've found that these fundamental utensils are absolutely non-negotiable for holiday meal preparation:
Measuring Tools:
1 set of measuring cups (both dry and liquid)
2 sets of measuring spoons
1 kitchen scale
Basic Utensils:
3 wooden spoons
2 silicone spatulas
1 set of tongs
1 large whisk
2 microplane graters
1 colander
Here's my practical guide for utensil materials based on different cooking needs:
Cooking Task | Recommended Material | Why I Choose It |
Stirring Hot Foods | Wooden/Bamboo | Won't scratch pans, heat-resistant |
Scraping Bowls | Silicone | Flexible, won't react with acids |
Serving | Stainless Steel | Durable, dishwasher-safe |
Mixing Dough | Plastic | Easy to clean, lightweight |
Time-saving Appliances
I rely heavily on these appliances to streamline my holiday cooking process:
Stand Mixer
I use it for: dough kneading, whipping cream, mixing batters
Time saved: approximately 30 minutes per recipe
Must-have attachments: paddle, whisk, dough hook
Food Processor
Perfect for: chopping vegetables, making pie crusts, preparing stuffing
Features I find essential: various blade attachments, large feed tube
Capacity needed: minimum 11-cup bowl
Slow Cooker
Ideal for: making stocks, keeping dishes warm
Size recommendation: 6-8 quarts for holiday cooking
Features I prefer: programmable timer, keep-warm function
Baking Essentials
My holiday baking success depends on having these crucial items:
Core Baking Tools:
Sheet pans (3 minimum)
Cooling racks (2-3)
Pie dishes (2)
Cake pans (2 9-inch rounds)
Loaf pans (2)
Temperature Control Tools:
Oven thermometer
Instant-read thermometer
Candy thermometer
Here's my tested combination of pan types for different holiday bakes:
Baked Good | Pan Type | Special Features |
Cookies | Heavy-gauge aluminum | Rimmed edges |
Pies | Glass or ceramic | Deep dish |
Cakes | Non-stick metal | Straight sides |
Bread | Cast iron | Heat retention |
I've learned that investing in quality equipment saves money in the long run. For example, my heavy-duty sheet pans have lasted over 10 years, while cheaper ones needed replacement after just one or two seasons. When selecting new tools, I always consider:
Durability:
Material quality
Construction method
Brand reputation
Functionality:
Versatility
Ease of cleaning
Storage requirements
Value:
Price point
Warranty
Expected lifespan
I keep my holiday cooking organized by storing these tools in dedicated spaces. During the holiday season, I ensure they're easily accessible and maintain them properly before and after use. With this equipment ready, I can focus on the actual cooking process, which brings us to creating an effective preparation timeline for the holiday feast.

Preparation Timeline
I've learned through years of holiday hosting that a well-planned timeline is the key to a stress-free celebration. Let me share my proven preparation schedule that has saved me countless times from last-minute chaos.
Two Weeks Before
I always start my preparations two weeks ahead to ensure everything runs smoothly. Here's my essential checklist:
Finalize guest list and confirm dietary restrictions
Create detailed shopping lists (separating non-perishables and perishables)
Order specialty items or hard-to-find ingredients
Deep clean kitchen and dining areas
Test and verify all equipment is working properly
Purchase or prepare freezable items
Task Category | Items to Complete |
Menu Planning | Finalize menu, create recipe cards, portion calculations |
Shopping | Non-perishables, decorations, serving pieces |
Equipment | Check oven calibration, sharpen knives, verify storage containers |
One Week Before
I dedicate this week to more focused preparations:
Begin purchasing non-perishable ingredients
Start defrosting frozen items in the refrigerator
Make and freeze items like pie crusts, cookie dough, and bread
Polish serving pieces and iron linens
Set up beverage station plans
Create a cooking schedule for remaining days
During this phase, I've found it crucial to organize my refrigerator and freezer, making space for upcoming items. I also label everything with cooking dates and instructions.
Day Before
This is when I tackle the bulk of my prep work:
Vegetable preparation:
Wash and chop vegetables
Prepare herb garnishes
Mix dry ingredients for baked goods
Protein preparation:
Brine turkey or ham
Marinate any meats
Prepare stuffing ingredients
Time Block | Priority Tasks |
Morning | Grocery final run, prep vegetables |
Afternoon | Make appetizers, prepare marinades |
Evening | Set tables, chill beverages |
Day of the Event
I follow this hour-by-hour schedule:
6:00 AM: Remove turkey from refrigerator (if cooking)
7:00 AM: Begin primary cooking tasks
9:00 AM: Start side dish preparation
11:00 AM: Monitor cooking temperatures
1:00 PM: Begin final presentations
2:00 PM: Last-minute garnishing
Last-minute Fixes
Over the years, I've developed these reliable solutions for common issues:
Dry Turkey:
Have extra warm broth ready
Slice thinly and layer with gravy
Lumpy Gravy:
Use an immersion blender
Strain through a fine-mesh sieve
Cold Food:
Keep dishes warm in a low-temperature oven (170°F)
Use chafing dishes or warming trays
Timing Issues:
Have quick-cooking backup dishes ready
Keep appetizers handy for hungry guests
I always remember that timing is everything in holiday cooking. With this organized approach, I can handle unexpected situations while maintaining the quality of every dish. Now, let's explore how to accommodate various dietary restrictions while keeping everyone satisfied at the holiday table.
Dietary Accommodations
Vegetarian Options
I've found that creating delicious vegetarian options for holiday meals is both exciting and rewarding. My go-to strategies include reimagining traditional dishes with plant-based ingredients while maintaining familiar flavors and textures.
Here are my favorite vegetarian holiday dishes:
Mushroom Wellington with caramelized onions
Roasted butternut squash and sage risotto
Lentil and chestnut loaf
Green bean almondine with crispy shallots
Wild rice and cranberry stuffed acorn squash
I always ensure these dishes are protein-rich and satisfying. Here's my comparison of protein sources I commonly use:
Protein Source | Grams per Cup | Best Uses |
Lentils | 18g | Main dishes, stuffings |
Quinoa | 8g | Side dishes, salads |
Chickpeas | 15g | Roasts, appetizers |
Seitan | 25g | Main dish alternatives |
Mixed nuts | 20g | Toppings, stuffings |
Gluten-free Alternatives
In my experience, gluten-free holiday cooking requires careful attention to ingredients and cross-contamination. I've developed several strategies to adapt traditional recipes:
Flour Substitutions:
All-purpose gluten-free flour blend
Almond flour for crusts and cookies
Cornstarch for thickening gravies
Rice flour for coating
Coconut flour for baking
My tested gluten-free conversion table:
Traditional Ingredient | Gluten-free Alternative | Ratio |
Wheat flour | GF flour blend | 1:1 |
Breadcrumbs | GF oats/crushed nuts | 1:1 |
Pasta | Rice/quinoa pasta | 1:1 |
Soy sauce | Tamari/coconut aminos | 1:1 |
Roux | Cornstarch slurry | 2 tbsp:1 cup liquid |
Allergen-free Dishes
When I prepare allergen-free holiday dishes, I focus on creating safe yet delicious options that everyone can enjoy. My top allergen-free substitutions include:
For dairy:
Coconut milk for heavy cream
Nutritional yeast for cheese flavor
Coconut oil for butter
Cashew cream for sauces
For eggs:
Ground flaxseed mixture
Mashed banana
Commercial egg replacer
Aquafaba for meringues
I've developed this comprehensive allergen substitution guide:
Common Allergen | Safe Alternative | Best Used In |
Tree nuts | Seeds/pepitas | Toppings/crusts |
Soy | Coconut aminos | Marinades/sauces |
Dairy | Plant-based milks | Baking/cooking |
Eggs | Flax eggs | Binding/leavening |
Wheat | Alternative grains | All purposes |
My key tips for allergen-free cooking:
Label all dishes clearly
Use separate utensils and preparation areas
Keep ingredient lists readily available
Double-check all packaged ingredients
Maintain strict cross-contamination protocols
I always stress the importance of communication when handling dietary restrictions. I make it a point to discuss menu options with guests beforehand and maintain detailed ingredient lists for every dish. This helps ensure everyone can enjoy the holiday meal safely and comfortably.
To avoid cross-contamination, I use a color-coded system in my kitchen:
Red tools: Contains common allergens
Green tools: Allergen-free
Blue tools: Gluten-free
Yellow tools: Vegetarian/vegan
Now that we've covered dietary accommodations, let's explore the crucial aspects of food safety and storage to ensure our carefully prepared dishes remain fresh and safe throughout the holiday celebrations.

Food Safety and Storage
Temperature Guidelines
When I prepare holiday meals, I always prioritize food safety through proper temperature control. I've learned that maintaining the right temperature is crucial for preventing foodborne illnesses, especially during large holiday gatherings.
Here's my essential temperature guide that I follow religiously:
Food Category | Safe Internal Temperature |
Poultry (whole) | 165°F (74°C) |
Ground Meats | 160°F (71°C) |
Beef, Pork, Lamb (roasts) | 145°F (63°C) |
Fish and Shellfish | 145°F (63°C) |
Leftovers (reheating) | 165°F (74°C) |
I always keep my refrigerator at 40°F (4°C) or below and my freezer at 0°F (-18°C). For hot foods, I maintain them above 140°F (60°C) during serving to prevent bacterial growth in the danger zone.
Storage Solutions
My holiday cooking involves preparing various dishes ahead of time, so proper storage is essential. I've developed a systematic approach to storing different types of holiday foods:
Short-term Storage (1-3 days):
I use airtight containers for prepared sides
I wrap meats in butcher paper or foil
I store fresh herbs in water-filled jars
I keep desserts in cake carriers or covered plates
Long-term Storage (freezer):
I vacuum seal meats and seafood
I use freezer-safe containers for soups and sauces
I double-wrap baked goods in plastic wrap and foil
I label everything with contents and date
I've found that investing in quality storage containers makes a significant difference. I use glass containers with snap-locking lids for most items, as they're both airtight and transparent, making it easy to identify contents.
Leftovers Management
Managing leftovers is one of my biggest holiday challenges. Here's my comprehensive system for handling post-holiday foods:
Immediate Post-Meal Protocol:
I cool foods to room temperature within 2 hours
I separate large portions into smaller containers
I remove stuffing from poultry before storing
I label everything with contents and date
My leftover storage timeline:
Food Type | Refrigerator Storage | Freezer Storage |
Turkey/Ham | 3-4 days | 2-6 months |
Stuffing | 3-4 days | 1 month |
Gravy | 1-2 days | 2-3 months |
Vegetables | 3-4 days | 2-3 months |
Desserts | 3-4 days | 1-2 months |
To maximize food safety and minimize waste, I follow these practices:
I always use clean utensils when serving leftovers
I reheat foods thoroughly to 165°F (74°C)
I never refreeze thawed foods
I trust my senses but always err on the side of caution
For creative leftover usage, I plan ahead with recipes like:
Turkey sandwiches with cranberry sauce
Leftover vegetable soup
Ham and potato hash
Holiday casseroles
I've found that proper food handling during the holidays not only prevents waste but also ensures my guests' safety. With these storage and safety practices in place, I can focus on what really matters - enjoying time with family and friends. Now, let's explore how to present and serve these carefully prepared dishes in an elegant and appealing way.

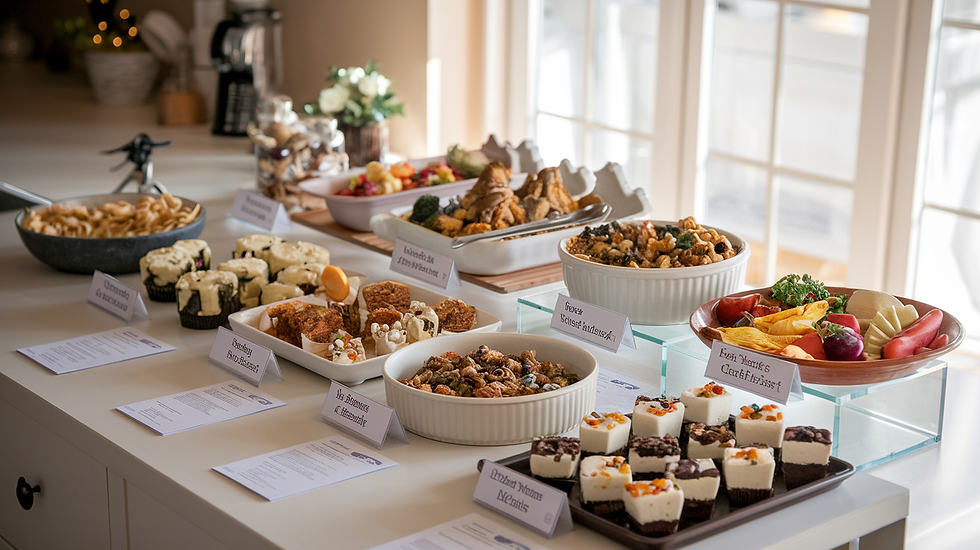
Presentation and Serving
Table Setting Tips
I've learned through years of hosting holiday gatherings that a well-set table creates the perfect backdrop for any festive meal. Here's my tried-and-true approach to creating an inviting table setting:
Element | Position | Special Tips |
Dinner Plate | Center of place setting | Leave 24 inches between settings |
Fork | Left side | Place in order of use, from outside in |
Knife/Spoon | Right side | Knife blade faces plate |
Water Glass | Above knife | Arrange other glasses to right |
Napkin | Left of forks or on plate | Choose fabric over paper |
I always make sure to follow these essential table-setting steps:
Layer linens starting with a crisp tablecloth
Position charger plates for an elegant foundation
Arrange centerpieces at eye level for seated guests
Include place cards for organized seating
Add ambient lighting with strategically placed candles
Food Display Ideas
When it comes to food presentation, I believe in creating visual interest through varying heights and textures. My favorite display techniques include:
Vertical Arrangements:
Use tiered serving platters
Incorporate cake stands for appetizers
Stack complementary dishes
Add height with fresh greenery
Color Coordination:
Group foods by color families
Create contrast with serving pieces
Use garnishes strategically
Include seasonal decorative elements
Garnishing Techniques
I've mastered several garnishing techniques that instantly elevate any holiday dish:
Garnish Type | Best Used For | Preparation Method |
Herb Sprigs | Savory dishes | Fresh cut, pat dry |
Citrus Twists | Beverages/Desserts | Spiral cut, oil side up |
Edible Flowers | Salads/Desserts | Rinse gently, keep stems |
Microgreens | Main courses | Clip fresh, arrange loosely |
My essential garnishing rules include:
Keep garnishes edible and complementary to the dish
Use odd numbers for aesthetic appeal
Ensure garnishes are proportional to serving size
Consider color contrast with the main dish
Make sure garnishes are fresh and food-safe
Portion Control
I've developed a reliable system for managing portions during holiday meals:
Main Course Guidelines:
Turkey/Ham: 6-8 oz per person
Side dishes: 4-6 oz per person
Vegetables: 3-4 oz per person
Desserts: 3-4 oz per person
Serving Tools:
Use appropriate serving utensils
Pre-slice larger items
Provide portion-specific serving pieces
Label serving sizes when possible
I always consider these factors when planning portions:
Number of dishes being served
Guest demographics and preferences
Timing of the meal
Desired leftovers
My experience has taught me that proper portion control helps prevent food waste while ensuring everyone gets to enjoy each dish. I use clear serving utensils and pre-portioned displays to maintain consistent serving sizes throughout the meal.
Now that we've covered presentation and serving, let's talk about how I ensure food safety and proper storage during holiday gatherings. A beautiful presentation is meaningless if the food isn't handled safely, which brings us to our next important topic.

Through my experience with holiday meal planning, I've learned that success lies in careful preparation and attention to detail. From organizing the perfect menu and gathering essential kitchen tools to creating a realistic timeline and ensuring food safety, each element plays a crucial role in hosting a memorable holiday feast. I've found that being mindful of dietary restrictions and focusing on beautiful presentation can make every guest feel valued and welcomed at my table.
I encourage you to use this guide as your foundation for holiday cooking success. Remember, the most important ingredient is your dedication to creating wonderful memories through food. Start planning early, stay organized, and don't be afraid to put your own personal touch on traditional recipes. Your guests will appreciate the love and effort you put into making their holiday experience special.

Comments